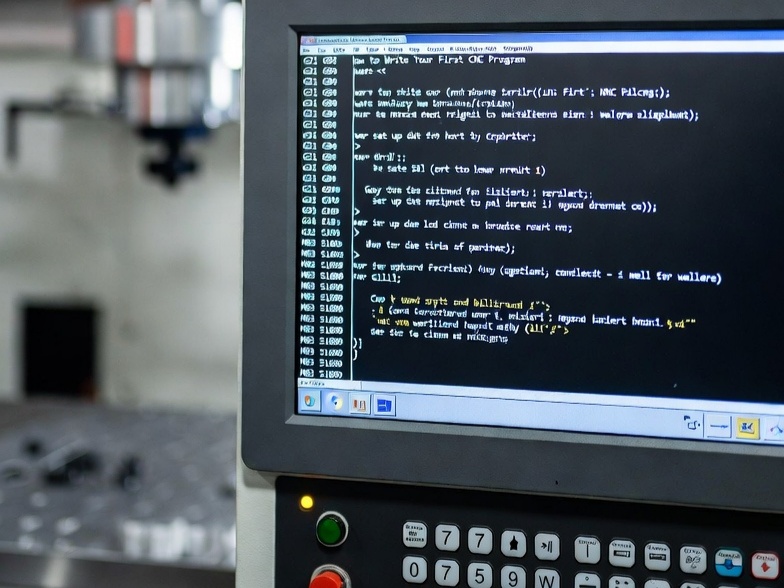
How to Write Your First CNC Program
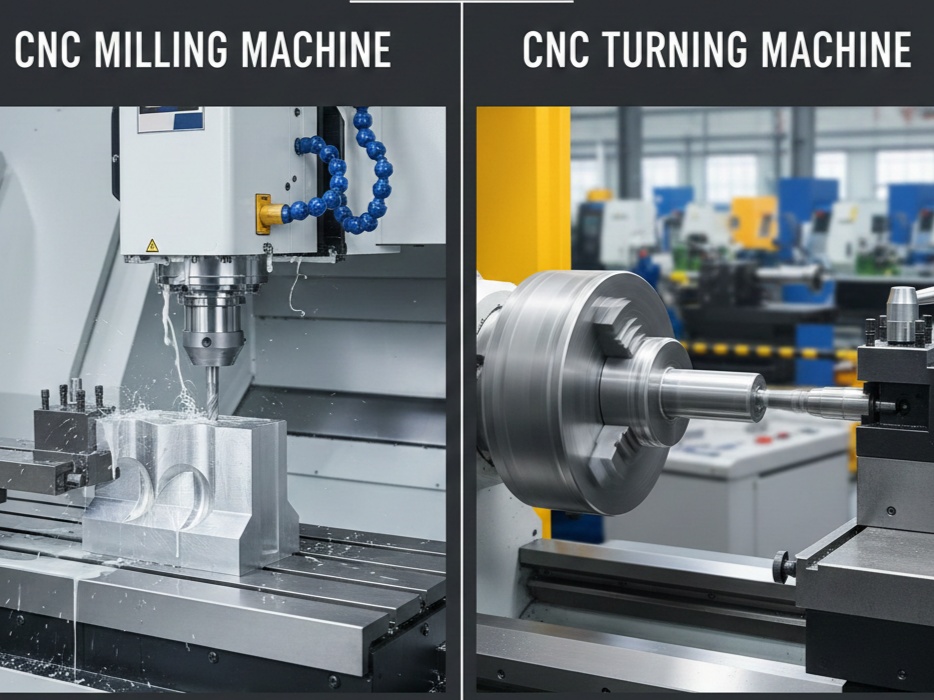
Computer Numerical Control (CNC) programming is the cornerstone of modern manufacturing, enabling precise control of machinery such as mills, lathes, routers, and plasma cutters. At its core, CNC programming involves creating a sequence of instructions that dictate the movements, speeds, and operations of a machine tool to fabricate parts from raw materials. This guide is designed for aspiring machinists, engineers, or hobbyists with a basic understanding of machining principles, aiming to produce a professional-level first program. We’ll cover the fundamentals, step-by-step creation, best practices, and troubleshooting, targeting a comprehensive 1400-word exploration.
CNC programming evolved from numerical control (NC) systems in the mid-20th century, where punched tapes were used. Today, it’s predominantly done using G-code, a standardized language defined by ISO 6983 (also known as RS-274). G-code tells the machine “what” to do (e.g., move linearly or in an arc), while M-codes handle miscellaneous functions like spindle control or coolant activation. Professional CNC programmers must balance efficiency, safety, and precision, often integrating CAD/CAM software for complex designs.
Before diving in, ensure you have access to a CNC machine or simulator. Popular software includes Mach3/4 for hobbyists, Fusion 360 for integrated CAD/CAM, or Mastercam for industrial applications. Safety is paramount: always wear protective gear, secure workpieces, and verify programs in a dry run.
Understanding G-Code and M-Code Basics
G-code commands are modal, meaning they remain active until overridden. Common preparatory G-codes include:
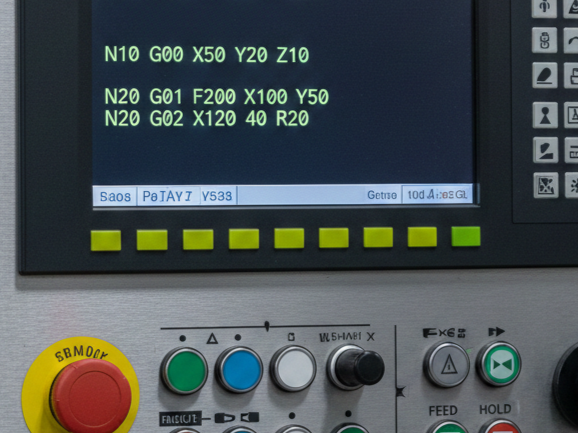
- G00: Rapid positioning (non-cutting move at maximum speed).
- G01: Linear interpolation (straight-line cut at feed rate).
- G02/G03: Circular interpolation (clockwise/counterclockwise arcs).
- G17/G18/G19: Plane selection (XY, XZ, YZ for milling).
- G20/G21: Units (inches/metric).
- G90/G91: Absolute/incremental positioning.
M-codes are non-modal and execute specific actions:
- M03/M04: Spindle on (clockwise/counterclockwise).
- M05: Spindle off.
- M08/M09: Coolant on/off.
- M30: Program end and reset.
Coordinates are crucial: X, Y, Z axes define position, with A, B, C for rotary axes in advanced setups. Feed rates (F) are in units per minute, spindle speeds (S) in RPM. A typical line might read: G01 X10.0 Y5.0 F100.0 (move linearly to X=10, Y=5 at 100 units/min).
Professional tip: Use absolute positioning (G90) for beginners to avoid cumulative errors from incremental moves (G91). Always include a program header with details like part name, date, and programmer for traceability in production environments.
Setting Up Your Programming Environment
To write your first program, select a suitable editor. Notepad++ or VS Code with G-code syntax highlighting plugins work well for manual coding. For CAM-assisted programming, start with free tools like FreeCAD or Tinkercad, progressing to paid options like SolidWorks or RhinoCAM.
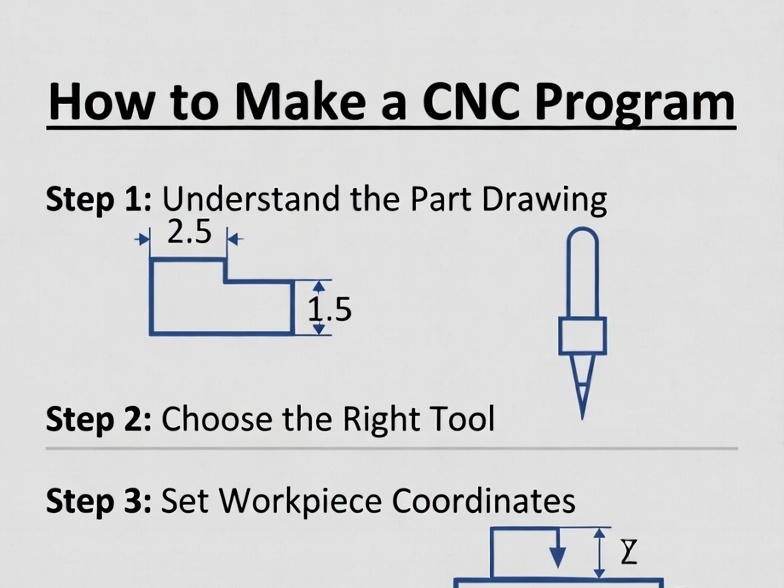
Begin by defining your workpiece: material (e.g., aluminum 6061), dimensions, and fixturing. Sketch the part manually or use CAD to generate a 2D/3D model. For a simple example, let’s program a basic pocket milling operation on a 3-axis vertical mill.
Machine setup involves:
- Homing the machine to establish reference points.
- Setting tool offsets (length and diameter) using a tool presetter or touch probe.
- Defining work coordinate systems (WCS) with G54-G59 offsets.
In code, start with safety lines: G21 (metric), G90 (absolute), G40 (cutter compensation off), G49 (tool length compensation off), G80 (canned cycle cancel).
Professional environments mandate version control: use Git for programs or integrate with PLM systems like Teamcenter.
Basic Structure of a CNC Program
A professional CNC program follows a structured format:
- Header: Comments (in parentheses) for metadata.
- Example: (Program: FirstPocketMill, Date: 01/05/2026, Programmer: AI Guide)
- Initialization: Set modes and units.
- G21 G90 G40 G49 G80
- T01 M06 (Tool change to tool 1)
- S2000 M03 (Spindle 2000 RPM on)
- G54 (Work offset 1)
- Body: Machining operations.
- Moves, feeds, and cycles.
- Footer: Shutdown.
- M05 M09
- G28 G91 Z0 (Home Z incrementally)
- M30
For cycles, use G81-G89 for drilling, G73 for peck drilling, or G82 for dwell. In milling, roughing passes remove bulk material, followed by finishing for surface quality.
Writing a Simple Program: Step-by-Step Example
Let’s create a program to mill a 50mm x 30mm rectangular pocket, 5mm deep, in aluminum, using a 10mm end mill. Assume workpiece zero at bottom-left corner, Z=0 at top surface.
Header:
(First CNC Program: Rectangular Pocket)
(Date: January 05, 2026)
(Material: Aluminum, Tool: 10mm End Mill)
Initialization:
G21 (Metric)
G90 (Absolute)
G40 G49 G80 (Cancel compensations and cycles)
T1 M6 (Tool 1 change)
S2500 M3 (Spindle on, 2500 RPM)
G54 (Work offset)
G43 H1 Z50.0 (Tool length compensation, safe Z)
Roughing Pass (Spiral entry for chip evacuation):
G00 X-5.0 Y-5.0 Z5.0 (Rapid to start, above surface)
G01 Z-2.5 F200.0 (Plunge at feed rate)
G01 X55.0 (Right)
G01 Y35.0 (Up)
G01 X-5.0 (Left)
G01 Y-5.0 (Down) // Close rectangle
G00 Z5.0 (Retract)
For full depth, repeat with Z-5.0, but use incremental depth cuts for professionalism: loop with G91 for steps.
Finishing Pass:
G00 X0 Y0 Z5.0
G01 Z-5.0 F150.0
G41 D1 (Left compensation on, offset 1)
G01 X50.0
G01 Y30.0
G01 X0
G01 Y0
G40 (Compensation off)
G00 Z50.0
Footer:
M5 (Spindle off)
M30 (End)
This program is about 30 lines; in practice, use subprograms (M98) for repetition.
Calculate feeds/speeds: For aluminum, chipload 0.05mm/tooth, 4-flute tool: F = RPM * flutes * chipload = 2500 * 4 * 0.05 = 500mm/min. Adjust for machine rigidity.
Safety Considerations in CNC Programming
Professional programming prioritizes safety. Include M00 (program stop) for operator checks. Use G04 for dwells to clear chips. Avoid rapid moves (G00) near workpiece to prevent crashes.
Implement soft limits in code or controller. For example, bound moves: if X>100, error. Always simulate: Use software like NC Viewer or CIMCO Edit to visualize paths.
In production, comply with OSHA standards: emergency stops, guarding, and lockout/tagout. For high-speed machining (HSM), use adaptive clearing to maintain constant tool engagement, reducing heat and breakage.
Testing and Simulation
Before running on hardware, dry run: Execute with spindle off, at reduced feed (use feed override). Monitor for anomalies.
Simulation tools: Vericut for industrial verification, detecting gouges or collisions. For free, G-Code Simulator apps.
Debug: If errors like “Invalid arc” occur, check I/J/K radius specifiers for G02/G03. Use incremental mode sparingly.
Version iterations: Save as V1, V2 for changes.
Common Mistakes and Troubleshooting
Beginners often forget units (G20 vs G21), leading to scaled errors. Mismatch tool offsets cause Z crashes. Overlooking cutter compensation (G41/G42) results in undersized/oversized parts.
Troubleshoot: Parse alarms (e.g., Fanuc “PS0010” for syntax). Log runs with macros.
Advanced: Optimize with high-efficiency milling (HEM) paths, reducing cycle time by 50%.
Advanced Tips for Professional Growth
Once comfortable, integrate variables (#1=10.0) for parametric programming. Use CAM for complex geometries: post-processors convert toolpaths to machine-specific code.
Learn API integrations for automation, like Python scripts generating G-code. Study ISO 14649 (STEP-NC) for future-proofing.
Join communities: CNCzone forums or Reddit’s r/CNC for peer review.
Practice on soft materials like foam before metals.
Conclusion
Writing your first CNC program is a blend of art and science, demanding precision and foresight. Start simple, simulate rigorously, and iterate. With practice, you’ll produce efficient, safe code for intricate parts. This foundation opens doors to aerospace, automotive, and custom fabrication. Remember, professionalism lies in documentation, safety, and continuous learning.